Cisco ISE allows you to create and delete repositories through the administrator portal. You can create the following types of repositories: Disk, FTP, SFTP, NFS, CD-ROM, HTTP and HTTPS.
In this post, we will configure an SFTP repository.
Configure the SFTP Repository from the GUI
1.- Choose Administration > System > Maintenance > Repository.
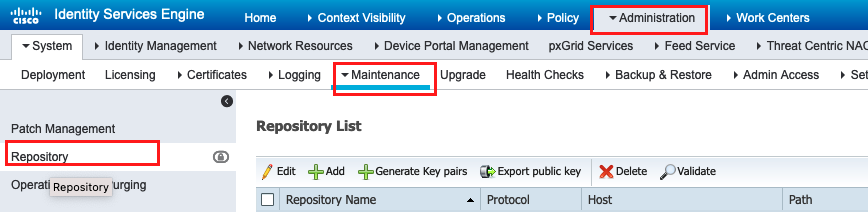
2.- Click Add to add a new repository.
3.- Provide Repository Name and choose SFTP as the protocol. Then enter Server Name, Path, User Name, and Password, and click Submit, as shown in the image.

4.- After you click Submit, a pop-up message appears. The message prompts you to use CLI to add the host-key of the SFTP server, as shown in the image.
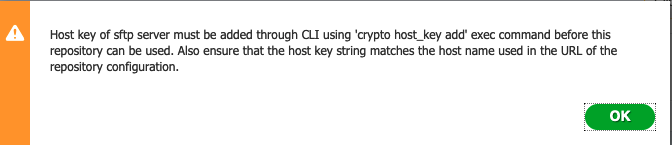
5.- Log in to the CLI of the ISE node via SSH and use the command crypto host_key add host <ip address of the server> to add the host key.

6.- Validate host-key with show crypto host command

7.- Finally, validate the repository from GUI. Select the repository and click on Validate.
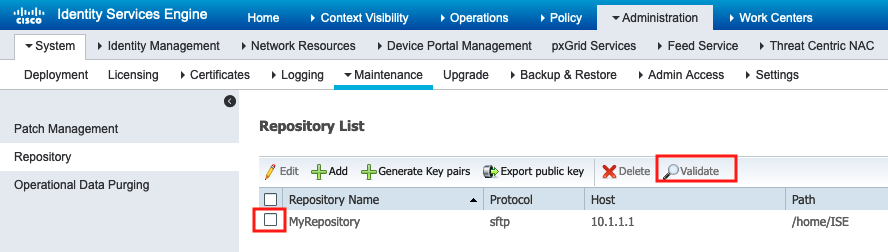
Will be appears the following message:

Configure the SFTP Repository from the CLI
1.- Log in to the CLI of the ISE node via SSH and run these commands:
ise/admin#

ise/admin# configure terminal
Enter configuration commands, one per line. End with CNTL/Z.
ise/admin(config)# repository MyRepository
ise/admin(config-Repository)# url sftp://10.1.1.1/

ise/adminconfig-Repository)# user <Username> password plain <Password>
ise/admin(config-Repository)# exit
ise/admin(config)# exit
ise/admin#
2.- Validate repository with CLI
In order to validate the repository from the CLI, log in to the ISE node via SSH and run the command show repository <name of the repository>. The output of the command lists the files present in the repository.
ise/admin#
ise/admin# show repository MyRepository
Config-Backup-CFG10-200307-1043.tar.gpg
ise-apply-CSCwa47133_Ver_24_30_allpatches-SPA.tar.gz
ise-patchbundle-2.7.0.356-Patch7-22022309.SPA.x86_64.tar.gz

ise/admin#
Repository Settings
| Fields | Usage Guidelines |
|---|---|
| Repository | Enter the name of the repository. Alphanumeric characters are allowed and the maximum length is 80 characters. |
| Protocol | Choose one of the available protocols that you want to use. |
| Server Name | (Required for TFTP, HTTP, HTTPS, FTP, SFTP, and NFS) Enter the hostname or IP address (IPv4 or IPv6) of the server where you want to create the repository.Note Ensure that the ISE eth0 interface is configured with an IPv6 address if you are adding a repository with an IPv6 address. |
| Path | Enter the path to your repository. The path must be valid and must exist at the time you create the repository. This value can start with two forward slashes (//) or a single forward slash (/) denoting the root directory of the server. However, for the FTP protocol, a single forward slash (/) denotes the FTP of the local device home directory and not the root directory. |
| Enable PKI authentication | (Optional; applicable only for SFTP repository) Check this check box if you want to enable RSA Public Key Authentication in SFTP repository. |
| User Name | (Required for FTP, SFTP) Enter the username that has write permission to the specified server. A username can contain alphanumeric and _-. /@\$ characters. |
| Password | (Required for FTP, SFTP) Enter the password that will be used to access the specified server. Passwords can consist of the following characters: 0 to 9, a to z, A to Z, -, ., |, @, #,$, ^, &, *, (, ), +, and =. |
Reference: